Product Photography with Phone: The Complete Guide to Stunning eCommerce Images
You don't need a DSLR to take product photos that sell. Modern smartphones capture images sharp enough for Amazon listings, Shopify stores, and social media — if you know how to use them properly.
At Pixel by Hand, we've edited product images for over 380 eCommerce brands across the last decade. We've seen what works, what doesn't, and exactly where DIY phone photography hits its limits. This guide gives you everything you need to shoot professional-quality product photos with the phone already in your pocket.
Table of Contents
- Best Phones for Product Photography
- Essential Accessories
- Setting Up Your Shoot
- Camera Settings That Matter
- Lighting for Phone Product Photography
- Composition and Angles
- Best Apps for Editing Product Photos
- Common Mistakes to Avoid
- Phone vs DSLR: When to Upgrade
- Professional Editing Makes the Difference
- FAQ
Best Phones for Product Photography
Not all smartphone cameras are created equal. For product photography, you want a phone with a large sensor, excellent colour accuracy, optical image stabilisation, and strong software processing. Here are the top choices across the three major ecosystems.
Phone Comparison Table
| Phone | Main Camera | Key Strength | Best For |
|---|---|---|---|
| Samsung Galaxy S24 Ultra | 200MP wide + 12MP ultrawide + 10MP 3x telephoto + 50MP 5x telephoto | Incredible detail and zoom range | Close-up product shots, jewellery, small items |
| Apple iPhone 15 Pro Max | 48MP wide + 12MP ultrawide + 12MP 5x telephoto | Consistent colour accuracy, ProRAW support | Clothing, lifestyle shots, colour-critical products |
| Google Pixel 8 Pro | 50MP wide + 48MP ultrawide + 48MP 5x telephoto | Best-in-class computational photography | Tricky lighting conditions, mixed-material products |
| Samsung Galaxy S24+ | 50MP wide + 12MP ultrawide + 10MP 3x telephoto | Excellent value flagship | General product photography on a tighter budget |
| Apple iPhone 15 Pro | 48MP wide + 12MP ultrawide + 12MP 3x telephoto | ProRAW, Action mode, reliable colours | All-round product photography |
What to Look For in a Phone Camera
When choosing a phone for product photography, megapixels are only part of the story. Pay attention to:
- Sensor size — Larger sensors capture more light, producing cleaner images with less noise.
- Lens quality — Look for optical image stabilisation (OIS) and low aperture numbers (f/1.7-f/2.2).
- RAW shooting support — Essential for professional-quality editing later.
- Manual/Pro mode — You need control over ISO, shutter speed, and white balance.
- Colour accuracy — iPhones tend to deliver true-to-life colours; Samsung can oversaturate. For product photography, accuracy matters more than vibrancy.
Essential Accessories
Your phone's built-in camera is the starting point, but a few affordable accessories will dramatically improve your results.
Must-Have
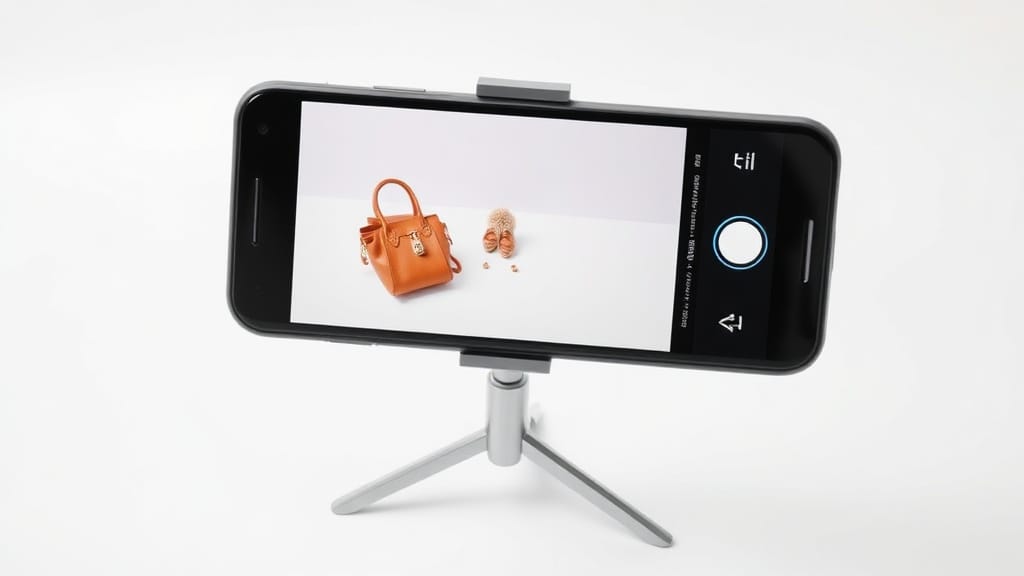
- Tripod with phone mount — Eliminates camera shake entirely. Essential for consistent, sharp images. Budget options start around £15.
- Remote shutter release — Bluetooth remotes cost under £10 and prevent any movement when you press the shutter.
- White card or foam board — Acts as a bounce reflector and a clean background. A few sheets of white A1 card from any stationery shop will do.
Worth the Investment
- Clip-on macro lens — Ideal for jewellery, watches, and small product details. Brands like Moment and Xenvo offer quality options from £20-£80.
- Portable lightbox — A 40cm or 60cm lightbox with built-in LEDs provides consistent, even lighting for small-to-medium products. Around £25-£50.
- Diffuser panel — Softens harsh natural light. Even a sheet of translucent white fabric over a window works.
Nice to Have
- Wide-angle clip-on lens — Useful for larger products or lifestyle context shots.
- Colour calibration card — Ensures accurate white balance across your entire shoot.
Setting Up Your Shoot
Before you touch the camera app, get your environment right. Preparation is the difference between amateur snaps and professional product images.
1. Clean Your Lens
It sounds obvious, but it's the most commonly skipped step. Your phone lives in your pocket, picks up fingerprints, and collects dust. Use a soft, lint-free cloth and wipe the lens in a gentle circular motion before every shoot. Even a faint smudge creates haze across the entire image.
2. Choose Your Background
Keep it simple. A plain white or light grey background puts the focus entirely on your product. Options:
- White card or foam board — Cheapest and most effective for flat lays and small items.
- Seamless paper sweep — Tape a large sheet of white paper to a wall and let it curve down to your shooting surface for a clean, shadow-free look.
- Fabric backdrop — Useful for lifestyle-style shots, but keep textures subtle.
If you're selling on Amazon or other marketplaces, most require a pure white background anyway — which is something our editing team can handle in post-production.
3. Position Your Product
Place your product in the centre of your shooting area. Make sure it's stable and displayed at its best angle. If you're photographing clothing, consider using a mannequin or flat lay technique. For the invisible mannequin effect — where the garment appears to be worn by an invisible person — you'll need ghost mannequin editing in post-production.
4. Charge Up and Clear Storage
A full product shoot can generate hundreds of images, especially if you're shooting in RAW format. Make sure your phone is fully charged and has at least 5-10GB of free storage before you begin.
Camera Settings That Matter
Auto mode is convenient, but for product photography you want manual control. Most modern phones offer a Pro or Manual mode — use it.
ISO
Keep it as low as possible: 100 or 200. Low ISO means less digital noise (grain) in your images. Only increase ISO if you genuinely cannot get enough light into the scene — and even then, adding more light is always the better solution.
Shutter Speed
For stationary products on a tripod, you can use slower shutter speeds like 1/30 or 1/60 of a second without any issue. If you're shooting handheld or capturing a model wearing your product, bump it up to 1/250 or faster to freeze any movement.
Aperture
Most phone cameras have a fixed aperture (typically f/1.7 to f/2.2), but some flagship models offer variable aperture or software-simulated depth control. A wider aperture (lower number) creates background blur — useful for hero shots. For catalogue images where everything needs to be sharp, use the phone's standard mode without portrait blur.
White Balance
Set this manually to match your lighting conditions. Incorrect white balance is the number one reason DIY product photos have a yellow or blue colour cast. Touch the WB control in your camera app and either:
- Select the preset that matches your light source (daylight, cloudy, tungsten, fluorescent), or
- Use a white card to set a custom white balance.
Shoot in RAW
If your phone supports it, always shoot in RAW (DNG) format. RAW files retain all the data from your camera sensor, giving you far more flexibility when editing exposure, colour, and white balance afterwards. On iPhone, enable Apple ProRAW. On Samsung and Google, switch to Pro mode and select RAW output.
Lighting for Phone Product Photography
Lighting makes or breaks your product photos. Get this right and even a mid-range phone will produce impressive results.
Natural Light
The best free lighting available. Set up your shooting area next to a large window — ideally one that doesn't receive direct sunlight. You want bright, diffused light that wraps around your product without creating harsh shadows.
Tips for natural light:
- Shoot on overcast days for the softest, most even light.
- If direct sun hits your window, hang a white sheet or use a diffuser panel to soften it.
- Place a white card or foam board opposite the window to bounce light back onto the shadowed side of your product.
- Shoot during the middle of the day when light is strongest and most consistent.
Artificial Light
If natural light isn't reliable or you need consistency across a large batch of products, use continuous LED lights or a lightbox.
- LED panels — Affordable, adjustable brightness, and available in daylight-balanced colour temperatures. Two panels positioned at 45-degree angles to your product create even, professional lighting.
- Lightbox — Perfect for small products. The enclosed, diffused environment eliminates shadows and produces clean, marketplace-ready images.
- Avoid your phone's flash — Always. The built-in flash creates harsh, flat light with ugly shadows. It will make your products look worse, not better.
Ready to see what professional editing can do for your product photos? Send us your images for a free sample edit — no obligation, no credit card required.
Composition and Angles
How you frame your product matters as much as how you light it.
The Rule of Thirds
Enable the grid overlay in your camera app (most phones have this in settings). Place your product along the grid lines or at the intersection points rather than dead centre. This creates a more dynamic, visually appealing image.
For straightforward catalogue shots, centre-framing is perfectly fine — but for lifestyle and marketing images, the rule of thirds adds visual interest.
Essential Angles
Shoot every product from multiple angles:
- Front-on — The standard product listing image.
- 45-degree — Shows depth and dimension.
- Top-down / flat lay — Ideal for small items, accessories, and groupings.
- Detail close-ups — Textures, labels, stitching, materials.
- Back and sides — Customers want to see the full product.
Take More Than You Think You Need
Shoot far more images than you plan to use. It costs nothing and gives you options. For every product, aim for at least 20-30 shots across different angles, and then select the best 5-8 for your listing.
Best Apps for Editing Product Photos
Once you've captured your images, some light editing can elevate them further.
| App | Platform | Best For | Price |
|---|---|---|---|
| Adobe Lightroom Mobile | iOS / Android | RAW editing, colour correction, batch processing | Free (Premium from £9.99/mo) |
| Snapseed | iOS / Android | Quick adjustments, selective editing | Free |
| VSCO | iOS / Android | Colour grading, consistent aesthetic | Free (Premium from £29.99/yr) |
| Adobe Photoshop Express | iOS / Android | Background removal, basic retouching | Free |
| TouchRetouch | iOS / Android | Removing unwanted objects/blemishes | £3.49 one-off |
Important: Avoid applying filters to product photos. Filters alter colours and can make your product look different from reality — which leads to customer complaints and returns. Stick to adjustments: exposure, contrast, white balance, and sharpness.
Common Mistakes to Avoid
We've seen thousands of DIY product photos come through our editing queue. These are the mistakes we see most often:
| Mistake | Why It Hurts | Fix |
|---|---|---|
| Using digital zoom | Crops and enlarges the image, destroying detail and sharpness | Move physically closer to your product, or crop in editing |
| Shooting with the front camera | Far lower quality sensor than the rear camera | Always use the rear-facing camera |
| Using the built-in flash | Creates harsh, flat lighting with hard shadows | Use natural light or external LED panels |
| Shooting in direct sunlight | Creates blown-out highlights and deep shadows | Find open shade or use a diffuser |
| Cluttered backgrounds | Distracts from the product and looks unprofessional | Use a plain white or neutral background |
| Applying Instagram-style filters | Alters product colours, misleading customers | Edit for accuracy: exposure, white balance, sharpness only |
| Not cleaning the lens | Creates hazy, soft images | Wipe with a lint-free cloth before every shoot |
| Shooting at high ISO | Introduces visible grain/noise | Keep ISO at 100-200 and add more light instead |
Phone vs DSLR: When to Upgrade
Phone product photography is genuinely excellent for many use cases. But it does have limits.
Phone Photography Is Good Enough When:
- You're selling on marketplaces (Amazon, eBay, Etsy) and need clean, simple product images.
- Your products are small-to-medium sized.
- You're launching a new product line and need images quickly.
- Your budget is tight and you'd rather spend on professional editing than equipment.
- You need lifestyle or social media content alongside your catalogue shots.
Consider a DSLR When:
- You're photographing highly reflective or transparent products (glassware, jewellery with gemstones).
- You need extremely large print-resolution images.
- You're doing high-volume studio shoots (500+ SKUs).
- You need precise depth-of-field control for creative product imagery.
- Your brand identity depends on a very specific photographic style that requires manual lens selection.
The honest truth: For 80% of eCommerce sellers, a modern flagship phone combined with good lighting and professional post-production editing will produce images that are indistinguishable from DSLR shots on a product listing page.
Professional Editing Makes the Difference
Even perfectly shot product photos benefit from professional editing. Consistent backgrounds, accurate colour correction, precise cropping, and clean retouching are what separate good product images from great ones.
At Pixel by Hand, we specialise in exactly this. Our team has over 10 years of experience editing product images for eCommerce, and we work with more than 380 brands worldwide. Our services include:
- Background removal and replacement — Clean white backgrounds for marketplace compliance.
- Colour correction — Ensuring your product colours are true-to-life across all images.
- Ghost mannequin editing — The invisible mannequin effect for clothing and apparel.
- Retouching — Removing dust, creases, blemishes, and imperfections.
- Consistent cropping and alignment — So your entire product catalogue looks cohesive.
Start your free trial today — send us a selection of your product images and we'll show you what professional editing can do. All sample edits are completely free, with no obligation.
FAQ
Can I really take professional product photos with just my phone?
Yes. Modern flagship phones from Apple, Samsung, and Google have cameras capable of producing high-quality product images suitable for eCommerce listings, social media, and web use. The key factors are proper lighting, a clean background, and steady positioning — not the camera body itself. Pair phone photography with professional editing and the results rival DSLR output for online use.
What's the best phone for product photography in 2026?
The Samsung Galaxy S24 Ultra leads on raw detail and zoom capability. The iPhone 15 Pro Max offers the most accurate colours and best RAW file support. The Google Pixel 8 Pro excels in computational photography and mixed lighting. All three are excellent choices — pick the ecosystem you're most comfortable with.
Do I need to buy accessories for phone product photography?
A tripod and phone mount are the only true essentials — together they cost under £25 and make an enormous difference to image sharpness and consistency. A remote shutter release (under £10) and a white bounce card (under £5) are also highly recommended. Everything else is optional.
Should I shoot in RAW or JPEG?
Shoot in RAW whenever possible. RAW files preserve all the data from your camera sensor, giving you much more flexibility to adjust exposure, white balance, and colour in editing without degrading image quality. JPEGs are compressed and discard data permanently. On iPhone, enable ProRAW; on Samsung and Google, use Pro mode with RAW output selected.
How important is lighting for phone product photography?
Lighting is the single most important factor in product photography — more important than your phone model, your background, or your editing. Soft, even, diffused light (either from a window on an overcast day or from LED panels with diffusers) will produce dramatically better results than any amount of post-processing can fix. Never rely on your phone's flash.
When should I hire a professional photographer instead of using my phone?
If you're photographing large volumes (500+ SKUs regularly), highly reflective or transparent products, or need images for large-format print, a professional studio setup with a DSLR makes sense. For most eCommerce sellers with small-to-medium product ranges, phone photography combined with professional editing from Pixel by Hand delivers excellent results at a fraction of the cost.
Need help turning your phone photos into polished, marketplace-ready product images? Get started with a free trial — send us your images and see the difference professional editing makes.